1. Before you install
TheBlue is not a PHP theme. It is a full Node.js application with a MySQL database. On cPanel, the hosting account must provide a persistent Node.js application feature such as Setup Node.js App, Application Manager or Passenger.
Keep these ready before starting:
- Your DevWebThemes TheBlue licence code.
- The same email address used for the DevWebThemes purchase.
- A domain or subdomain already pointed to the hosting account.
- cPanel File Manager and Terminal/SSH access.
- An empty MySQL/MariaDB database and database user.
- Node.js 22 when available.
- At least about 1 GB of available build memory on shared hosting; 2 GB or more is preferred.
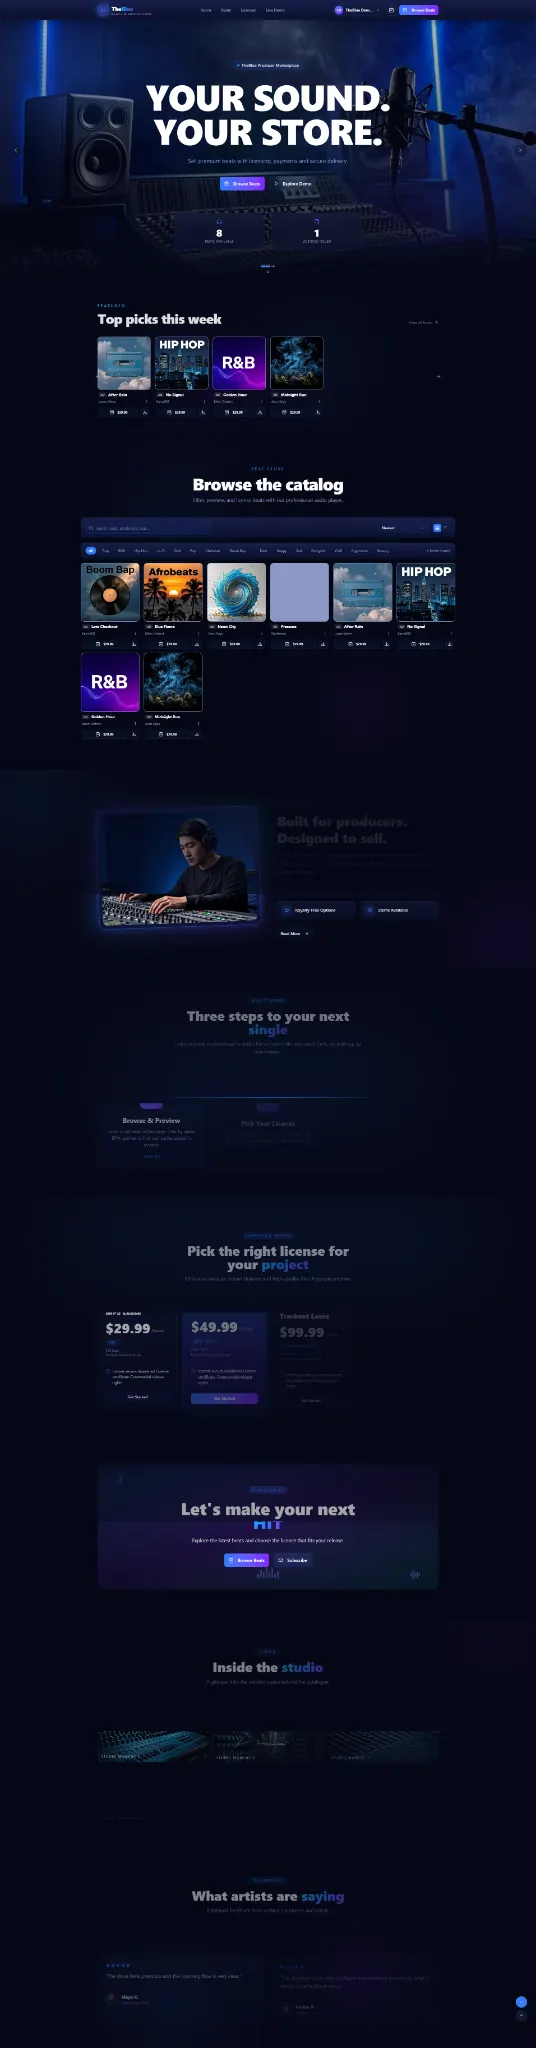
2. Server requirements
| Requirement | Minimum | Recommended / notes |
|---|---|---|
| Node.js | 20.9+ | Node.js 22 LTS / cPanel Node 22 |
| npm | 10+ | Use the npm supplied by the cPanel Node virtual environment |
| Database | MySQL 5.7+ or compatible MariaDB | MySQL 8.x recommended |
| Memory | Host must complete the production build | 1 GB practical minimum, 2 GB preferred |
| Disk | Application + build + uploads | Keep generous space for private masters and backups |
| HTTPS | Required for production | Use cPanel AutoSSL / Let's Encrypt or a trusted proxy |
| Outbound HTTPS | Required | Needed for DevWebThemes licensing and payment/provider APIs |
| Persistent Node process | Required | cPanel Passenger, PM2, systemd, Docker or equivalent |
3. Choose the right hosting
Node-enabled cPanel
Supported when the account includes Setup Node.js App/Application Manager, Terminal and enough build resources.
Linux VPS
Best for larger stores, higher traffic, custom Nginx, PM2/systemd, Redis/CDN and predictable server resources.
Docker
Supported for controlled infrastructure and repeatable deployments.
A PHP-only host is not supported. XAMPP can provide MySQL for local development, but TheBlue itself still runs through Node.js.
4. Domain and DNS
For a test install you may use a subdomain such as beats.example.com.
Create the required A/AAAA/CNAME record at the DNS provider. DNS must resolve before the browser can reach cPanel.
Use cPanel → Domains. The Node application URL will later use this hostname.
After DNS resolves, issue AutoSSL or another certificate. Use the final https:// URL during installation.
DNS_PROBE_FINISHED_NXDOMAIN mean the hostname is not reaching the server yet. Fix DNS before troubleshooting Node.js.5. Create the MySQL database
In cPanel → MySQL Databases or Database Wizard:
- Create a new empty database.
- Create a new database user with a long unique password.
- Add the user to the database.
- Grant ALL PRIVILEGES to that database.
- Record the full cPanel-prefixed database name and username.
Example only
Database: cpaneluser_theblue
User:     cpaneluser_theblue
Host:     127.0.0.1
Port: 33066. Upload and extract the buyer ZIP
Upload the DevWebThemes buyer ZIP and extract it into a clean application folder in your cPanel home directory, for example:
/home/CPANEL_USER/theblueThe application root must directly contain files such as:
package.json
package-lock.json
server.js
install.sh
next.config.ts
src/
prisma/
public/
scripts/
docs//theblue/TheBlue-v1.5.0/package.json, either move the files up one level or point the cPanel Application root to the inner folder.Normal Linux permissions are directories 755 and files 644. The installer creates private storage with restrictive permissions when the host supports it.
7. Create the cPanel Node.js application
Open cPanel → Setup Node.js App (the wording can vary by host) and create the application.
| Field | Recommended value |
|---|---|
| Node.js version | 22.x |
| Application mode | Production |
| Application root | The folder containing package.json, for example theblue |
| Application URL | Your final domain/subdomain |
| Application startup file | server.js |
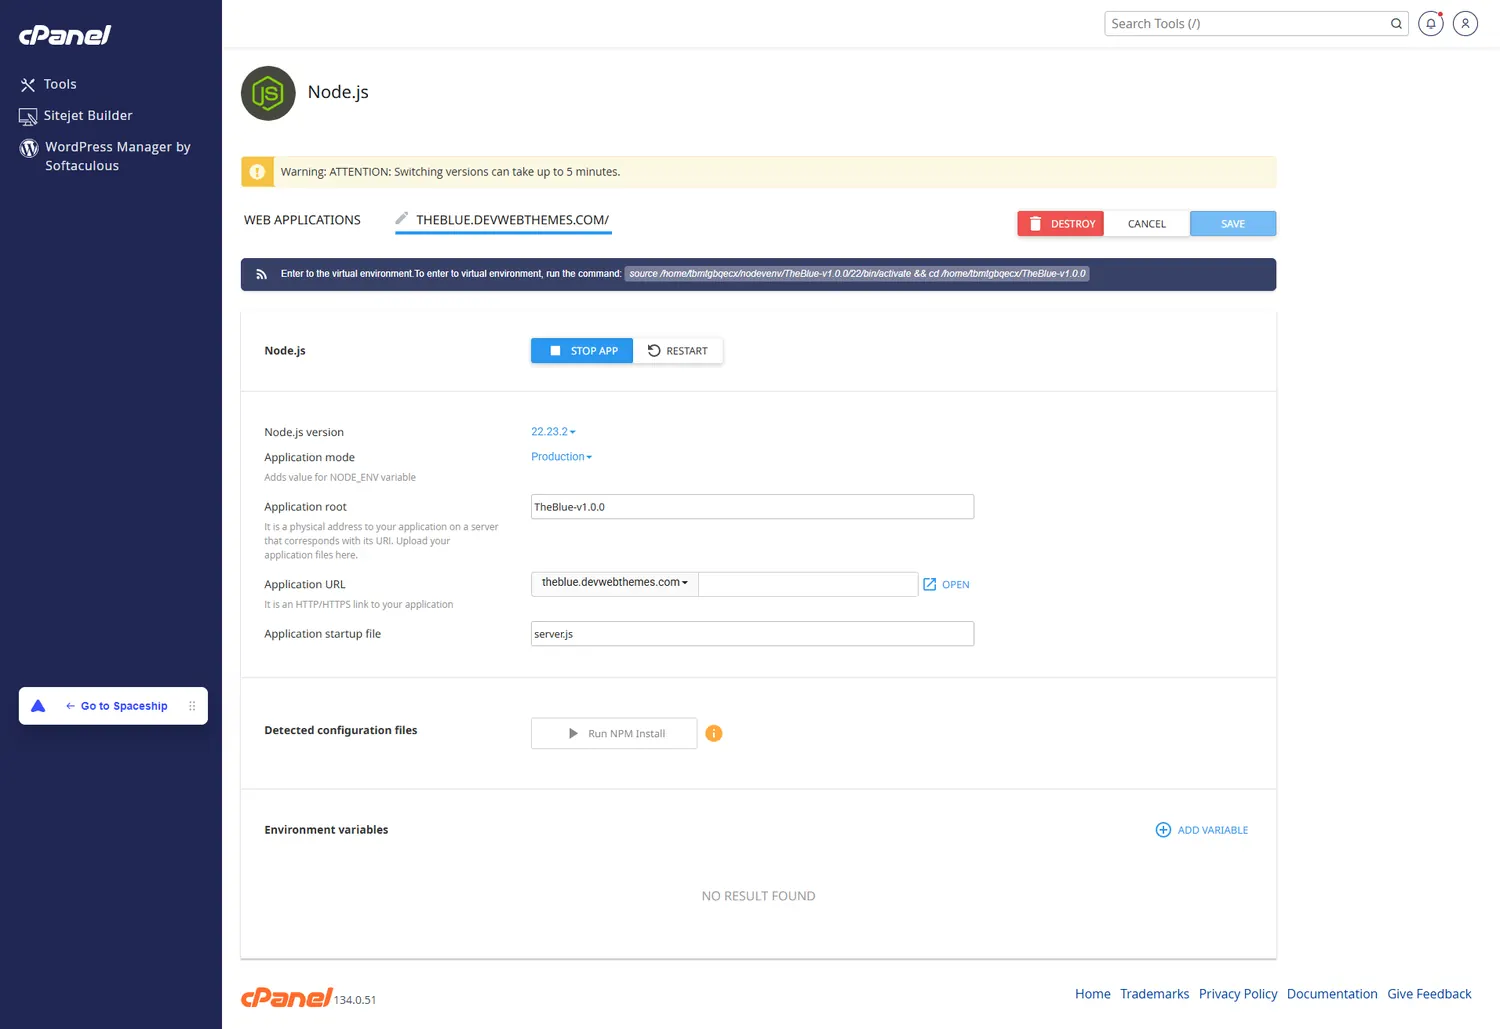
After creation, cPanel displays a command for entering the application's virtual environment. Save that command. It normally looks similar to:
source /home/CPANEL_USER/nodevenv/theblue/22/bin/activate && cd /home/CPANEL_USER/theblue8. CloudLinux: run NPM Install from cPanel first
If your host uses CloudLinux Node.js Selector, click Run NPM Install in the Node.js App screen before running ./install.sh.
CloudLinux stores modules inside the application's virtual environment and exposes them through a symlink named node_modules. TheBlue detects this layout.
node_modules -> /home/CPANEL_USER/nodevenv/theblue/22/lib/node_modulesnode_modules directory. That can make cPanel's installer refuse to manage dependencies.TheBlue's cPanel install checks for the build packages it needs, including Next.js, Prisma, TypeScript and Tailwind's PostCSS integration.
9. Run the Terminal installer
Enter the Node environment with the exact command shown by your Node.js App page.
node -v
npm -vchmod +x install.sh
./install.shThe installer checks the dependency lock, detects CloudLinux, validates required packages and launches the guided server setup.
Answer the prompts
| Prompt | What to enter |
|---|---|
| MySQL host | Usually 127.0.0.1 or the database host supplied by your provider |
| MySQL port | Usually 3306 |
| Database name | The full cPanel database name |
| Database user | The full cPanel database username |
| Database password | The database user's password. It is hidden in a normal interactive terminal. |
| Public website URL | The full URL including https://, for example https://beats.example.com |
| Store name | Your public store/business name |
| Support email | The public support/sender email |
| Business location | City/country or the business location you want configured |
https:// or http://. Entering only beats.example.com is not a valid URL.What the installer does automatically
- Creates a protected
.env. - Generates the session secret, app key, cron secret, install key and stable installation ID.
- Configures the DevWebThemes activation endpoint and product slug.
- Creates private storage.
- Runs server preflight checks.
- Validates the Prisma schema and generates Prisma Client.
- Deploys all production database migrations.
- Builds the production application.
- Prepares Next.js standalone output.
- Prints the one-time installation key.
Why the cPanel build is different
TheBlue automatically uses its cPanel-safe build path on CloudLinux. It uses Webpack rather than Turbopack, enables Next.js memory optimizations, limits page-generation build concurrency to one worker, and uses a conservative Node heap target. These choices exist because many shared cPanel servers expose old Linux libraries and strict memory/process limits.
10. Restart and open the browser installer
When the Terminal installer finishes, copy the one-time Installation key. Return to cPanel → Setup Node.js App and click Restart Application.
Then open:
https://YOUR-DOMAIN/install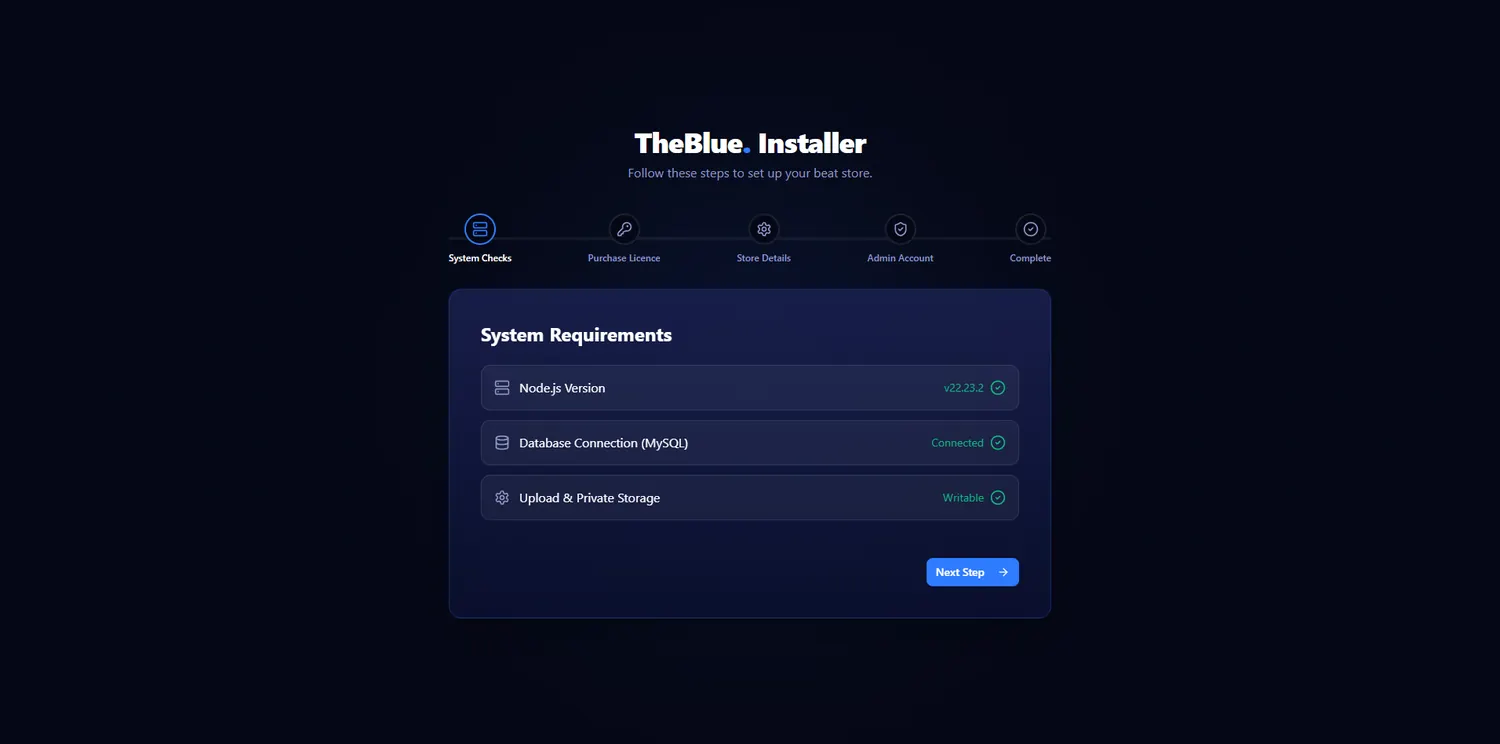
Installer steps
- System Checks — Node, database and writable private storage must be green.
- Purchase Licence — enter the DevWebThemes licence code and the purchase email.
- Store Details — confirm store name and support/contact email.
- Admin Account — enter the administrator information, strong password and the one-time installation key printed by Terminal.
- Complete — the installer activates the licence, creates the admin and locks the installation state.
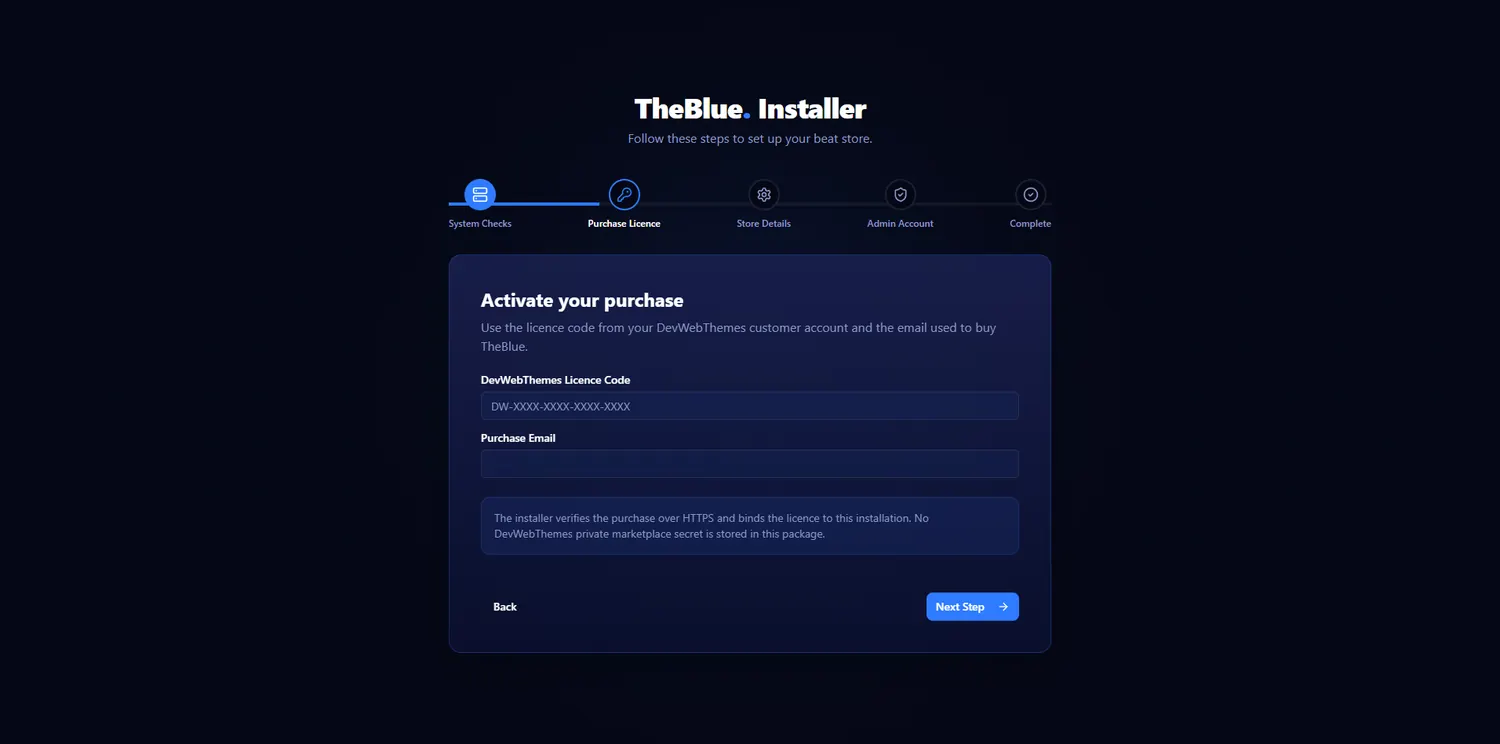
11. DevWebThemes licence activation
TheBlue is linked to the DevWebThemes licensing service using:
Product slug: theblue
Activation endpoint: https://devwebthemes.com/api/v1/license/activate
Purchase email required: yes
After purchasing, sign into DevWebThemes and open the customer licence area. Copy the TheBlue licence key and use the same purchase email in the installer.
TheBlue submits the licence key, purchase email, product slug, product version, installation domain, environment type and a stable installation ID. DevWebThemes returns an opaque activation token. The buyer package does not contain the marketplace private secret.
The local activation record is stored in:
storage/license.jsonstorage/license.json to another website. It belongs to the licensed installation and domain.12. Immediately after installation
- Remove
INSTALL_TOKENfrom.envor the cPanel environment variables. - Restart the Node application.
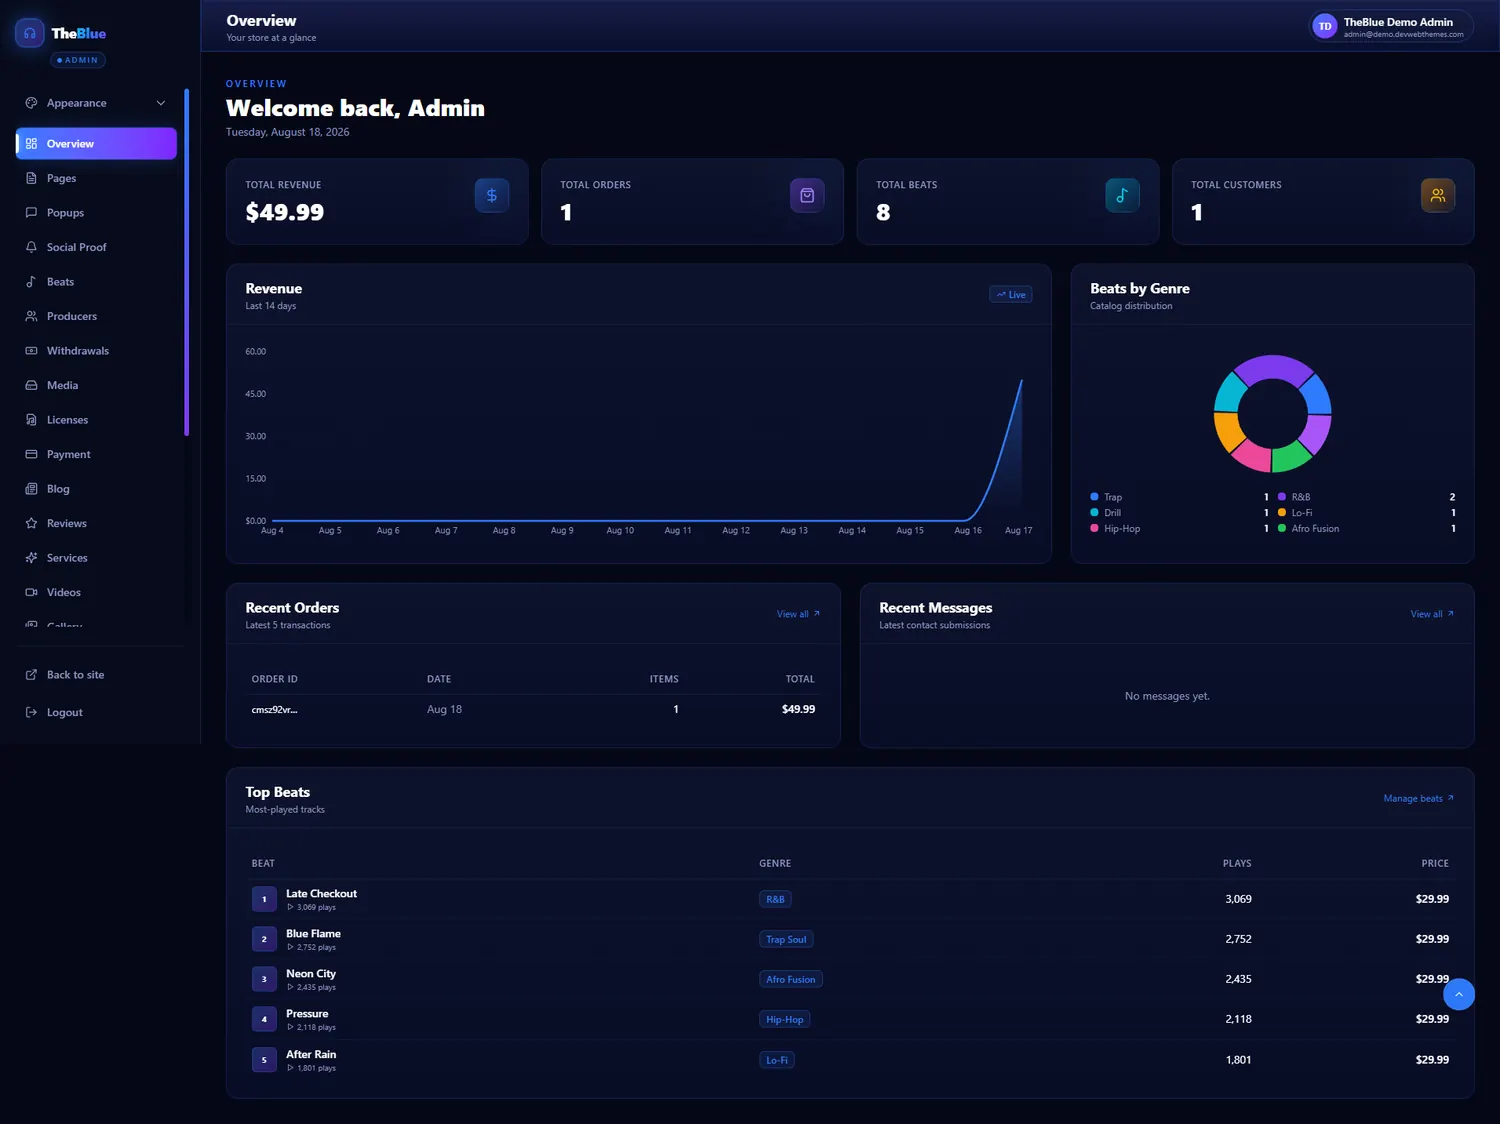
- Sign in to the administrator account.
- Open Admin → Settings and replace starter business/contact information.
- Configure branding, SEO and legal pages.
- Configure SMTP and send a real test email.
- Configure payment gateways in sandbox/test mode.
- Test a full customer journey before going live.
- Back up the clean installed database and application.
13. Configure scheduled cleanup
Run cleanup at least every 15 minutes. On cPanel, use the Node/npm path provided by your host:
*/15 * * * * cd /home/CPANEL_USER/theblue && /usr/bin/npm run cleanup >/dev/null 2>&1The cleanup task releases expired exclusive reservations, stale transactions and old rate-limit state. If /usr/bin/npm is not valid on your host, use the executable path from the Node virtual environment.
14. HTTPS, proxy and CDN
- Use HTTPS before accepting logins or payments.
- Keep
TRUST_PROXY=truebehind cPanel Passenger, Nginx, Caddy or Cloudflare where the forwarded headers are trusted. - Redirect HTTP to HTTPS at the hosting/proxy layer.
- Do not cache private dashboard, checkout, installer, licence or download responses at a CDN.
- Static
/_next/static/assets can use long cache lifetimes.
15. Configure SMTP email
SMTP_HOST=smtp.example.com
SMTP_PORT=587
SMTP_USER=account@example.com
SMTP_PASS=your-secret
SMTP_SECURE=false
SMTP_ALLOW_PLAINTEXT=false
EMAIL_FROM=sales@example.com
EMAIL_FROM_NAME="Your Store"
Use STARTTLS on 587 or implicit TLS on 465 according to the provider. Test registration/password recovery, order emails, invoices, licence emails and support/contact messages.
For deliverability, configure SPF, DKIM and DMARC for the sending domain.
16. Payment gateways
Configure payment credentials from the administration area. Use test/sandbox credentials first. TheBlue's commercial configuration includes support wiring for PayPal, PayChangu, Stripe, Paystack and Flutterwave where enabled in the installed release.
Production checklist
- Use the exact final HTTPS callback/webhook URL.
- Keep secret keys server-side.
- Verify provider signatures/webhooks.
- Confirm amount and currency server-side.
- Test success, cancellation, duplicate webhook, delayed webhook and refund/revocation behaviour.
- Do not accept live payments until the merchant account is fully approved by the provider.
17. Private files and S3-compatible storage
Paid masters must not be exposed as normal public files.
Local private storage
STORAGE_PROVIDER=local
PRIVATE_STORAGE_PATH="/absolute/private/path/storage/private"
MAX_UPLOAD_BYTES=524288000
DEFAULT_MAX_DOWNLOADS=5
S3-compatible storage
STORAGE_PROVIDER=s3
S3_BUCKET=private-beat-masters
S3_REGION=...
S3_ACCESS_KEY_ID=...
S3_SECRET_ACCESS_KEY=...
S3_ENDPOINT=
S3_FORCE_PATH_STYLE=false
Use a private bucket and least-privilege storage credentials. Large masters are better stored outside the web server when the catalogue grows.
18. Administrator first configuration
Before advertising the site, review at least:
- Appearance, logo, colours and typography.
- Homepage sections and hero content.
- Beats, producers and media.
- Licence tiers and legal wording.
- Payment settings.
- Email/SMTP and email branding.
- SEO, Open Graph and PWA assets.
- Legal/policy pages.
- Services, blog, reviews, gallery/video areas as applicable.
- Contact page and admin message inbox.
19. Performance and slower 3G networks
TheBlue is designed around production standalone output, optimized static assets, server-rendered public content, lazy-loading and caching. Hosting and uploaded media still matter.
- Use WebP/AVIF artwork and keep normal cover images small.
- Do not use full WAV masters for public previews. Use compressed tagged preview audio.
- Use a CDN for public static assets.
- Move large private masters to S3-compatible storage when appropriate.
- Avoid unnecessary autoplay video on mobile.
- Use Brotli/gzip at Nginx, Cloudflare, Caddy or the hosting layer.
- Keep the database indexed and avoid unbounded catalogue pages.
- Measure the real live domain using mobile network throttling after each major homepage change.
20. Lifetime product updates
Lifetime updates are product release files. They do not include unlimited custom development, unlimited hosting administration or perpetual managed-service work.
Safe cPanel update flow
- Back up the database,
.env, private storage and uploads. - Read the release notes.
- Extract only the official update/release files as instructed. Never overwrite a live
.envwith an example. - Enter the Node virtual environment.
- If dependencies changed, use cPanel's Run NPM Install when using CloudLinux Node Selector.
- Run:
chmod +x scripts/cpanel-build.sh
./scripts/cpanel-build.sh
The cPanel build validates the current environment, applies pending migrations, rebuilds and prepares standalone output. Restart the Node app after completion.
21. Backup and restore
Minimum backup set:
- Full MySQL database export.
.envstored securely.storage/privatewhen using local private storage.- Runtime public uploads/media.
- Any custom code or custom theme overrides.
Keep at least one backup outside the web server. Test restore procedures before a major update.
22. Linux VPS deployment
For a VPS, use the supplied Nginx/Caddy/systemd/PM2 examples under deployment/. A typical flow is:
npm ci --include=dev --no-audit --no-fund
./install.sh
npm run build
npm run prepare-standalone
npm start
Put Nginx or Caddy in front of the Node process, terminate HTTPS, configure a firewall, enable automatic security updates and use a process manager such as systemd or PM2.
23. Docker deployment
The release includes Dockerfile and docker-compose.yml. Do not copy production secrets into an image layer. Use environment variables or secret management. Back up the external MySQL database and private storage volumes.
24. Windows / local development
Install Node.js 20.9+ and MySQL. XAMPP can provide MySQL, but TheBlue still runs as a Node application.
install.cmd
npm start
Use http://localhost:3000 for local testing. Local/staging activation treatment is determined by the DevWebThemes licence entitlement.
25. Troubleshooting
| Problem | What it means / what to do |
|---|---|
| DNS error / server IP not found | The domain is not reaching cPanel yet. Fix DNS first. |
| 403 after opening the domain | Check the domain mapping and cPanel Node application. A raw folder is being served or permissions/document root are wrong. |
It works! NodeJS ... | cPanel is still running its default test application. Confirm the Application root and startup file server.js. |
| 503 Service Unavailable | The Node process is not running, the standalone build is missing, the startup file is wrong, or the app crashed. Check stderr.log and restart after a successful build. |
node: command not found / npm: command not found | Activate the cPanel Node virtual environment first. |
CloudLinux says node_modules must be separate | Let cPanel manage the node_modules symlink. Remove a manually created local modules folder only when you are sure it is not the managed symlink, then use Run NPM Install. |
Cannot find module '@tailwindcss/postcss' | The cPanel dependency install is incomplete. Run NPM Install in the Node application and verify the package is present. |
GLIBC_2.29 not found | An old shared server cannot load the native Next.js SWC binary. TheBlue's cPanel build uses Webpack and the WASM fallback; do not force Turbopack. |
Turbopack is not supported ... native bindings are not available | Use the official cPanel build path. It selects Webpack automatically. |
| JavaScript heap out of memory | The host's build memory is too low. The cPanel build uses a conservative heap target, but the account still needs enough physical memory. Check cPanel Resource Usage or use a stronger plan/VPS. |
pthread_create: Resource temporarily unavailable | The shared account hit a process/thread limit. TheBlue limits cPanel builds to one worker. If the final package still cannot build, the hosting plan is too restrictive. |
Prisma P3015 migration file missing | Re-extract the official package with normal directory permissions. Do not delete migration folders from a buyer release. |
Authentication failed ... database credentials during build | Verify .env and database privileges. The official release loads the real configured DATABASE_URL during prerendering. |
Invalid URL during setup | Enter the complete public URL including https://. |
| Licence activation failed | Verify the TheBlue licence, purchase email, domain allocation, outbound HTTPS and that the DevWebThemes licence service is reachable. |
| Wishlist cannot load | Update to v1.0.3 or later. The customer favourites API contract was corrected in the commercial package. |
| Contact form blocked on an official demo | Update the hosted demo to v1.0.3 or later. Commercial installations are unaffected by the official demo's read-only proxy. |
26. Add-ons and TheBlue Academy
TheBlue v1.5.0 includes a dedicated Add-ons area in the administrator workspace. Add-ons are optional commercial extensions: the core marketplace remains lightweight, while buyers can install only the capabilities their business needs.
Install a purchased add-on
- Purchase/download the add-on from your DevWebThemes customer account.
- In TheBlue open Admin → Add-ons.
- Choose Install Add-on ZIP and select the original add-on ZIP. Do not extract the add-on ZIP first.
- Enter the add-on licence key and the email used for that add-on purchase.
- Choose Verify & install. TheBlue validates the package, version compatibility and DevWebThemes entitlement before activation.
TheBlue Academy
TheBlue Academy is the first official feature add-on. Once installed, administrators can create paid or free course products, organize modules and lessons, publish video/text/audio/download lessons, and enable completion certificates. Customers purchase course access through the normal TheBlue checkout and continue learning from Customer Dashboard → My Courses.
Academy and the official payment add-ons are available through the extension catalog. TheBlue v1.5.0 also supports separately licensed Google Login and Email Branding, plus the Growth Essentials Bundle that unlocks both. Google indexing, sitemap.xml, robots.txt and Search Console verification remain core features included with every TheBlue purchase.
27. Google Login, Email Branding & Search Indexing
Google Login add-on
After purchasing and activating the Google Login add-on, open Admin → Add-ons → Google Login. Enter a Google OAuth Web client ID and client secret, add the exact redirect URI shown by TheBlue to the Google Cloud project, and enable the module after testing.
Email Branding add-on
After activation, open Admin → Add-ons → Email Branding to configure the brand name, logo, email colors, support contact/footer and test recipient. The existing SMTP transport remains under the store owner's control.
Growth Essentials Bundle
The Growth Essentials Bundle is one add-on entitlement that unlocks Google Login and Email Branding together. Each module still has its own configuration page.
Google Search indexing is included
Every TheBlue installation includes /sitemap.xml and /robots.txt. Open Admin → Search Indexing to review indexable content counts and Search Console readiness. Sitemap availability helps search engines discover URLs; it is not a guarantee that a search engine will index every page.
27. Commercial pricing, installation and feature requests
Regular licence
Product-only licence for self-installation.
Extended licence
Includes one standard professional installation for the licensed deployment.
Custom feature work
Custom features, feature rebuilds and major integrations are separately quoted.
Feature requests
You may request a feature from DevWebThemes. Guaranteed custom development, a feature rebuild, or a feature built specifically for your installation starts from USD $250 and increases according to scope.
Verified defects in the unmodified official release are not treated as paid custom feature requests.
Lifetime updates
Buyers receive lifetime access to official TheBlue product updates released for their purchased licence. Each new purchase also includes 6 months of standard product support. Support and update access are separate entitlements. See COMMERCIAL-TERMS.md.
28. How to request support
Before contacting support, collect:
- TheBlue version.
- Hosting provider and hosting type.
- Node.js version.
- MySQL/MariaDB version.
- The exact step that failed.
- Exact error text and a short redacted log excerpt.
- A screenshot when the problem is visual.
- What you have already tried.
Also read SECURITY.md, SUPPORT.md, CHANGELOG.md, COMMERCIAL-TERMS.md and THIRD_PARTY_NOTICES.md.